

N8N is a powerful, open-source, and self-hostable workflow automation tool, perfect for connecting your apps with low-code logic. In this guide, we’ll walk through setting it up with Docker, PostgreSQL, and SSL encryption on Ubuntu 20.04 or 22.04. The best part is I will show you how to generate an activation key for all N8N premium features, so stick to the end of the blog post.
N8N stands out as a powerful alternative to other low-code automation platforms such as Make, Latenode, and others. Unlike many of its competitors, n8n is open-source, giving users full control and customization over their workflows. Stick around to the end of this guide—we’ll show you how to unlock premium features using a free activation key.
Why Go for the n8N automation tool?
Here’s why n8n is making waves and might be the automation sidekick your workflow deserves:
- Powerful Workflows Without Vendor Lock-In: N8N is open-source and self-hostable, meaning your data remains private and you’re not tied to any provider’s pricing or limitations. You can build advanced workflows with conditions, loops, error handling, and branching logic—without being boxed in.
- Extensive App Integrations: Connects with 350+ services like Slack, Google Sheets, Airtable, GitHub, and even your custom APIs. Native nodes make integration seamless, and you can create custom nodes if you need something special.
- Low-Code with High Control: Drag-and-drop interface for building flows visually. Add custom JavaScript code when needed to unlock dynamic logic or transformations.
- Self-Hosted = Privacy + Performance: Install it on your server or cloud instance (Docker-friendly setup!) to keep sensitive data in-house. Customize resources and permissions to suit enterprise-grade demands.
- Built for Growth: Whether you’re automating CRM updates, marketing campaigns, file transformations, or data syncs, n8n scales with you. Advanced scheduling and webhook support make it ideal for real-time automation and batch jobs.
- Developer-Friendly: Native Git support, CLI operations, and robust APIs for managing workflows programmatically. Works perfectly with tools like PostgreSQL, Redis, and Docker Compose
N8N Installation Prerequisites
Before you begin, ensure you have:
- Ubuntu 20.04 or 22.04 installed
- Root or sudo privileges
- A domain name (e.g.,
n8n.yourdomain.com) pointing to your server - Docker & Docker Compose installed
Once you have these available, the next step is to go on with our setup process.
N8N Installation Step-by-Step Guide
In this step-by-step guide, you will see how easy it is to have your workflow automation tool at zero cost.
Step #1: Install Docker & Docker Compose
Update your system and install Docker:
sudo apt update && sudo apt upgrade -y
sudo apt install -y docker.io docker-compose
sudo systemctl enable docker
Step #2: Prepare Project Directory
mkdir ~/n8n && cd ~/n8nStep #3: Configure Environment Variables
Create a .env File to store secrets and configuration:
nano .env
Paste and customize the following:
# PostgreSQL
POSTGRES_USER=postgres
POSTGRES_PASSWORD=postgrespass
POSTGRES_DB=n8n

# n8n DB user
DB_TYPE=postgresdb
DB_POSTGRESDB_HOST=postgres
DB_POSTGRESDB_PORT=5432
DB_POSTGRESDB_DATABASE=n8n
DB_POSTGRESDB_USER=postgresuser
DB_POSTGRESDB_PASSWORD=postgresuser@26

# Authentication
N8N_BASIC_AUTH_ACTIVE=true
N8N_BASIC_AUTH_USER=admin
N8N_BASIC_AUTH_PASSWORD=adminpass

# Other settings
N8N_SECURE_COOKIE=true
GENERIC_TIMEZONE=Africa/Lagos
N8N_HOST=n8n.yourdomain.com
N8N_PORT=5678
N8N_PROTOCOL=https
WEBHOOK_URL=https://n8n.yourdomain.com/
N8N_ENFORCE_SETTINGS_FILE_PERMISSIONS=true
Make sure you change n8n.yourdomain.com to your domain and password.
Step #4: Set Up Docker Compose
Create your docker-compose.yml file:
nano docker-compose.ymlPaste the full config with services for PostgreSQL, n8n, NGINX, and Certbot. This setup ensures secure deployment with SSL support.
version: "3.7"

services:
  postgres:
    image: postgres:16
    restart: always
    environment:
      POSTGRES_USER: ${POSTGRES_USER}
      POSTGRES_PASSWORD: ${POSTGRES_PASSWORD}
      POSTGRES_DB: ${POSTGRES_DB}
    volumes:
      - db_data:/var/lib/postgresql/data
      - ./init-data.sh:/docker-entrypoint-initdb.d/init-data.sh:ro

  n8n:
    image: n8nio/n8n
    restart: always
    env_file: .env
    volumes:
      - n8n_data:/home/node/.n8n
    depends_on:
      - postgres
    expose:
      - "5678"
    networks:
      - n8n_network

  nginx:
    image: nginx:alpine
    restart: always
    volumes:
      - ./nginx.conf:/etc/nginx/nginx.conf:ro
      - certbot-www:/var/www/certbot
      - certbot-etc:/etc/letsencrypt
    ports:
      - "80:80"
      - "443:443"
    depends_on:
      - n8n
    networks:
      - n8n_network

  certbot:
    image: certbot/certbot
    volumes:
      - certbot-etc:/etc/letsencrypt
      - certbot-www:/var/www/certbot
    entrypoint: "/bin/sh -c 'trap exit TERM; while :; do sleep 5; done'"
    networks:
      - n8n_network

volumes:
  db_data:
  n8n_data:
  certbot-etc:
  certbot-www:

networks:
  n8n_network:
Step #5: Initialize PostgreSQL User
Create a startup script:
nano init-data.shPaste this content:
#!/bin/bash
set -e;

psql -v ON_ERROR_STOP=1 --username "$POSTGRES_USER" --dbname "$POSTGRES_DB" <<-EOSQL
  CREATE USER postgresuser WITH PASSWORD 'Thereis25@#@$@26';
  GRANT ALL PRIVILEGES ON DATABASE ${POSTGRES_DB} TO postgresuser;
  GRANT CREATE ON SCHEMA public TO postgresuser;
EOSQL
Make it executable:
chmod +x init-data.shS Step #6: Configure NGINX for SSL
Create nginx.conf:
nano nginx.confPaste the NGINX configuration and replace n8n.yourdomain.com With your actual domain.
events {}

http {
  server {
    listen 80;
    server_name n8n.yourdomain.com;

    location /.well-known/acme-challenge/ {
      root /var/www/certbot;
    }

    location / {
      return 301 https://$host$request_uri;
    }
  }

  server {
    listen 443 ssl;
    server_name n8n.yourdomain.com;

    ssl_certificate /etc/letsencrypt/live/n8n.yourdomain.com/fullchain.pem;
    ssl_certificate_key /etc/letsencrypt/live/n8n.yourdomain.com/privkey.pem;

    location / {
      proxy_pass http://n8n:5678;
      proxy_http_version 1.1;
      proxy_set_header Upgrade \$http_upgrade;
      proxy_set_header Connection 'upgrade';
      proxy_set_header Host \$host;
      proxy_cache_bypass \$http_upgrade;
    }
  }
}
Step #7: Start Containers
Bring up all services:
docker-compose up -dStep #8: Generate SSL Certificates
To generate SSL certificates, Stop NGINX:
docker-compose stop nginxRun Certbot manually:
docker-compose run –rm certbot certonly \
–webroot –webroot-path=/var/www/certbot \
–email you@example.com \
–agree-tos \
–no-eff-email \
-d n8n.yourdomain.com
Step #9: Enable SSL & Restart Services
docker-compose up -dAccess n8n at: https://n8n.yourdomain.com
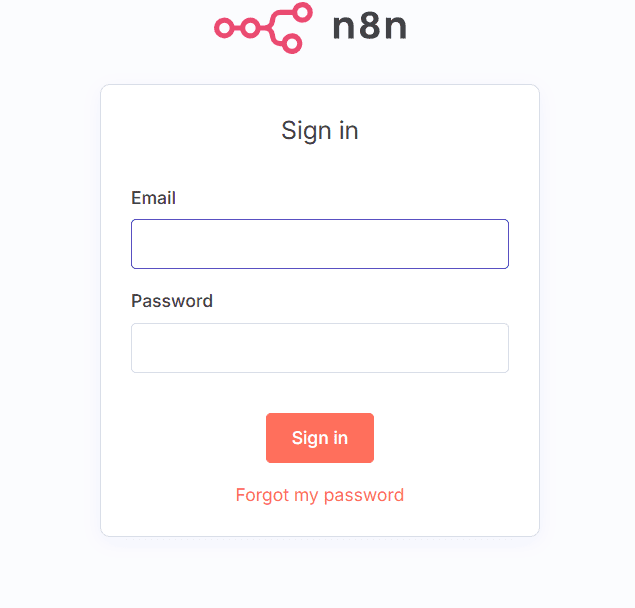
Username: admin | Password: adminpass
Optional: Auto-Renew SSL
Set up a cron job to renew your certificate daily:
sudo crontab -eAdd this code below the page:
0 0 * * * docker-compose run --rm certbot renew --webroot --webroot-path=/var/www/certbot && docker-compose kill -s HUP nginxBonus Tips
- Improve database security by enforcing user restrictions
- Change the default ports by editing
N8N_PORT - Use Docker volumes for easy backups
Conclusion
Installing N8N offers a convenient and efficient way to set up and manage workflow automation. Also, it’s free, which means no recurring fees to worry about! If you wish for us to set up one for you, contact us here.